Tuesday, January 18, 2022

PQ 13.2- In Silhouette

 How is it possible that week TWO of this seasons Project Quilting is already here? The one thing these challenges do is make these long winter months fly by a little faster and for that I am very grateful.

Sunday when the challenge came out I was busy most of the day and didn't get a chance to read what our challenge was going to be until that evening, and someone already had a project done and posted! I am amazed by all of the people who can think that fast, and then actually get something done. I decided maybe if I pushed myself I could get mine done by at least Wednesday.

This weeks challenge is "In Silhouette" as soon as I saw that I thought of my last weeks project, it would have been perfect. 

One of the things I love most about the challenges, is reading Kim and Trish's blog postings on the Persimon Dreams Blog at kimlapacek.com - the time and thought put into creating each of these challenges is amazing. I usually have to read the blog post two or three times just to get my brain working and get some inspiration for the week. In the challenge this week all we had to do was incorporate a silhouette into our design, other than that the sky was the limit. 

I was really excited when Trish mentioned German Scherenschnitte as an example, because a number of years ago I really got into Scherenschnitte and did all kinds of fun paper cutting designs, I am sure if I dig deep enough in my mess I would still have some of them, but I don't even want to dig very deep into my fabric stash because then I have to pick it all up, so I certainly wasn't going to go looking for inspiration in piles of papers.

I decided it would be fun to do something that resembled a scherenschnitte design, and thought of a photo I took a few years ago when the goats got on the back deck. I started on Sunday night and about half way through just didn't feel the inspiration so I threw it away. Back to the drawing board. 


I had a quilt to bind on Monday so while I was upstairs sewing I dumped out my batik tote and started looking for inspiration. One of the ideas Trish also mentioned in her blog post was Mexican Papal Picado. I love bright colored flags, especially Prayer Flags and Paper Picado, something about those little flags just make my heart happy. 

I decided that somehow I wanted create a little Día de Los Muertos scene with tiny paper flags as my silhouette.

A little history about Día de los Muertos, this is a Mexican holiday where families welcome back their deceased relatives for a brief reunion that includes food, drink and celebration. The holiday is celebrated from Halloween on October 31 through All Saints Day November 1st & All Souls Day on November 2nd.  Little alters called Ofrendas are prepared to honor loved ones who have passed away, symbols of the four elements: water, fire, earth and wind are used on the alters, as are other items such as photos of the deceased, salt, cempasuchil (marigold flowers) and bread. Each item represents something significant to the celebration.

The little Papel Picado Flags (which basically means chopped paper), represents the wind element. The holes in the paper are a way for souls to travel through to make their visit back to earth. 

The candles that are lit represent the fire element, these candles are used to light a path to guide the spirits home.

The bright orange marigolds are used because their strong fragrance is believed to attract spirits to the alter, and their orange color is associated with the feeling of celebrating life, instead of the sadness associated with death. 

An idea was forming as I sewed & dug through fabric, all I needed was the right fabric to make it work. I found a little 3" x 6"  scrap of purple fabric that made me think of the night sky. Surely there was more than mere inches of this fabric somewhere, why would I only have a scrap. Who saves tiny scraps of fabric? 


After digging through a pile of fabric that felt like it got larger as I dug, there was just that one little tiny piece of perfect purple, I knew there was no way I could cut flags small enough to use on that piece of fabric so I needed to add to it or scratch that idea completely.  

Between binding breaks I just keep sorting fabric, now this is not a neat and tidy sorting of fabric, this is more a dump out the fabric onto the floor, then dig through it and pull out colors that catch your eye type of sorting, stuff the discards back into the tote and rummage around some more. Every tote of fabric in my sewing room is a complete nightmare, but every one of them is full of treasure, maybe someday I will sort them out neatly, but chances are I will not.

I found a bright gold & orange batik that had swirls like glow of candles, not only were the swirls perfect, but the color was exactly like the marigolds. The crazy thing was it was also only about 6 inches wide so it fit the purple just right. Now all I needed was something to make my silhouette with and I was in business, I didn't have a solid black but I did find a strip of dark blue, I also found a fun purple and orange piece that had little patterns that were like the cutouts on the papal picado. 

I sewed the purple sky & the swirled gold fabrics together, trimmed them up a bit, then cut the edge of a swirled piece and used wonder under to iron it down to the top where the gold met the purple. I then used the dark blue to create my silhouettes of candles and ironed them down to the bottom of the gold, I zig zagged around them and created little wicks using black thread. 

I then quilted the candle glows with gold thread and used the purple/orange batik as my backing fabric, border and binding. Then the fun part began, I used gold sequins and orange beads to create the candle flames. I have all thumbs when trying to do things like hand sewing or beadwork, so this part of the whole project took the longest to create. It was probably a good thing I never found a larger piece of that purple! 

The next step was to create my paper flags. I thought seriously about using paper since I knew it would cut neater, but I knew that all I had for tissue paper in my house was red, green, gold or white leftovers from Christmas. So I dug back into the fabric until I found some tightly woven batiks in bright colors and not too much design and very carefully snipped out some tiny flags. 


Originally I was going to use a black pen and draw designs, but I knew I wanted them to be authentic and for you to be able to see the candles behind them. When the flags were done, I stitched them to a cord, ironed them good and stiff and then strung them onto my quilt.

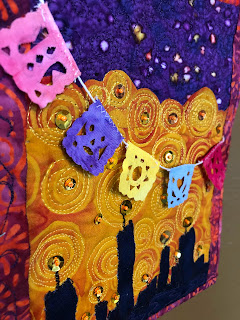
 I was done...before noon on Tuesday! My little quilt is 7 X 9  and as you can see my flags are the size of postage stamps. I don't like my silhouette candles, I think I could have put a bit more effort into making them look more like candles and less like a city scape, but overall I am happy with the way it turned out. 


Thursday, January 6, 2022

All the Colors- Project Quilting 13.1

 Here we are again, another season of Project Quilting has begun. For some reason this year felt like it started earlier than it has in the past. I know it didn't but that is how my life has felt since January 1, 2021...a day late, a dollar short and just totally confusing.

The first challenge of the year always seems like its the one where we all need to really stretch our imaginations and dust off our creativity, so it's always nice when its an easy challenge...this one probably was for some people, but Sunday rolled around and it was announced that they were going to get the "fun stuff" out of the way and start the season with a Color Challenge. This one really was pretty simple because we were to use ALL of the colors, and that was it. No other rules on how we had to use the colors, or a theme, or a thought, just use lots of colors in whatever you decided to create. 

I hate the color challenges, just give me all the grey and brown, don't make me think inside a color wheel. My brain was still overdosing on the red, green, silver and white Christmas decor that I was surrounded by.

 The 5 weeks between Thanksgiving and New Years this past year were busy, crazy, hard, on the road, going, going, going weeks. Looking back it was basically a blur of family time, and driving.

New Years Day arrived and it was COLD, bone chilling cold, and I was TIRED. So I slept, and slept and slept. Then I woke up to discover that the day was now evening, so I just went back to bed and slept some more. I never sleep, I am a 15 minute napper at best, a night owl and I feel like I've wasted my day if I sleep past 6:30 in the morning. You know when you have slept really deeply or overslept and you wake up and feel sort of confused and disoriented, well that is how I felt on the 2nd when the challenge came out. Tired, cold and confused.  

So apparently that's what I decided to create, something just totally confusing, that made absolutely no sense to anyone even me. On Monday I dug through my stash and pulled some different colorful fabrics, no plan yet, but I still had a week.  

Before the season began I had thought of ideas I wanted to try in at least one of the challenges,  one of the ideas was creating some sort of mosaic using fabric. So I decided maybe this would be my mosaic since we were using as many colors as possible.

 Those of you who know me, know I love music and can find a song to fit anything that is happening in my life at any given time, so of course my mind went to "what song can I incorporate into this?"

I thought about doing something with the song "Wildflowers" by Tom Petty, but then I didn't really want to mosaic wild flowers, basically because I was lazy.

 I looked up songs with colors, and found a list of songs that had colors in their titles, and of course "Purple Rain" by Prince topped the list, then there was a song called "Orange Sky" by Alexi Murdoch and I thought maybe I could mosaic an orange sky and somehow incorporate a purple rain in. So now I had a plan. 

I found all the somewhat orange fabric pieces I had in my batik stash, cut them up into random pieces and put them on a white background so they looked like a mosaic, and stitched around them to hold them down. I didn't like the white so I used ink to color between the pieces. Then I added some purple strips to the top to represent my purple rain clouds. Then I thought well there are two colors, we are supposed to use ALL the colors. So I did a weird strip of bright colors along the bottom that looked like a stick of that fruit stripe gum we all thought was so great when we were 10, but really wasn't. 


Well the bottom of my project wasn't either so I knew I needed to figure out a way to help it. I found a fun piece of batik that had a bunch of different colors in it, so I added a bigger strip of that and left it so I could cut it and fringe it. Then I had the random idea to add a purple fringe to the top, which once I did, I did not like, so I sewed a piece of blue rick rack over it and trimmed it partially off. 

About this time is when I realized that the disorientated days were turning into a completely disorientated project. But I am always a believer in "making it work" and if I was going to create a mess, I was going to own it! LOL 

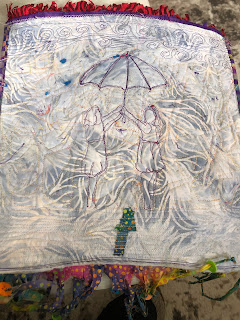
Somewhere in the trying to add more fringe to my mess to make it look less messy, I had this crazy idea that I should add some figures to the picture. 

A number of years ago my sister gave me these little red ceramic angel figurines that are kissing, in my mind I thought now that would incorporate red into my design and I needed some more colors...but then I looked at the figurines and decided this whole thing was going to confuse people anyway, I didn't need people to think I was completely off my rocker.

 So I found a picture of a silhouette of two girls holding hands with the sun under their raised hands and decided to do that. But then instead of just doing a sun, I saw a colorful scrap of batik that I thought would make a fun umbrella so I made them holding an umbrella since I still wanted to do my whole purple rain theme. I quilted the mosaic design and the girls onto a backing fabric and bound it with a colorful checkered batik. I could have been done here, but no. 


I was still struggling with the fringe situation, so I decided to fix that I would add more. I found a cool strip of red and purple zebra stripe and added a fringe of that to the top of my picture. Then I found an old vintage piece of black and white rick rack and added that to the bottom hoping it would hide the fact that I had used fruit stripe gum, it didn't, but then I decided (at the suggestion of my friend Scarlet who LOVED the sparkly tulle I had)  to layer tulle over the whole thing and then at the suggestion of Scarlets mom, cut the tulle away from the little girls and umbrella, thinking that would maybe give it some depth. I added an extra large folded piece of tulle to the bottom colored strips to sort of mute them down. Then decided why not add more fringe? LOL

So I took a piece of blue fabric and sewed another wonderful piece of fringe on top of the tulle to hide that crazy green, yellow and orange striped mess.  I also twisted the bottom batik fringe and added some bright colored buttons for weight. 

Before all the tulle was added I decided to sew little purple sequin stars around the mosaic back ground, and then I had a brilliant idea to take beading wire and create a rain effect with wire and beads. I was going to just cover the whole purple area with this wonderful idea. This is where the dream became a nightmare and I decided 8 wires were enough! While digging for purple beads I found a fun shell button shaped like a star and added that, which of course made me think of the song "Yellow" by Cold Play.


At some point since it was now Thursday I needed to stop adding fringe and decide there was an ending....So that's it, my "All the Colors" challenge piece for Project Quilting 13.1  

Random, a bit disorientated, unique, with lots of fringe and a little sparkle! 


Tuesday, March 2, 2021

You're Crazy! Project Quilting 12.5

 I was so excited when I saw the 5th Project Quilting Challenge on Sunday. The prompt for the week is "You're Crazy" and we are to create our own personal interpretation and be inspired by the "Crazy Quilt".

I LOVE Crazy Quilts. There is something so simple, yet oh so elegant about them. Women made them as show pieces, using their left over "Fancy" scraps of fabric and then probably sat around all winter long by lamp light and embellished them with bright colored thread, beads and baubles.  The fact that they are just random pieces of fabric put together without rules is what really attracts me to them. This is my kind of quilting. 

Taking an excerpt from the article "Crazy Quilts and Mad Women", [...] the crazy quilt trend of the nineteenth century, incorporated motifs from Japanese art and decor, English embroidery, and fairyland. [...] In an era obsessed with female hysteria, it is no surprise that crazy quilts were the order of the day.

Somewhere in my stash of quilting books I have a book about the history of crazy quilts and how to create your own. Of course this week it felt like too much work to dig it out and get some tips, so like the crazy lady I am I just decided to wing it. 

A number of years ago our quilt guild purchased a stash of fabric and then divided it amongst those of us who wanted to "buy into the stash", the lady who had owned the stash made costumes for the theatre and was a quilter. This was (is) the most amazing stash of fabric, in my share of the stash there was a box full of what I like to call "fancy" fabric. It was mostly dress lining fabric, satin and taffeta. It must have been from a specific show, or maybe a wedding, but all the colors are in varies shades of ivory, rose, coral, grey and pinks. I have absolutely no use for that box of fabric, but no one throws fabric away, so I knew I still had it somewhere and I needed it to use for my crazy quilt! The following photo is what the box looked like after I dumped it out on my sewing room floor....just like a crazy! LOL 


I love crazy quilts and HATE the color Rose pink. Which is what I had to work with, that and a little grey. I have absolutely no velvet fabric anywhere, but I did have some wool and also thought it would be a great idea to add some minky fabric to replicate velvet. (it wasn't but I made it work). While digging through my boxes I came across a little piece of embroidery and thought it would be fun to add this to my project to make it feel more authentic. 

My sewing machine has all sorts of different fancy stitches so after I cobbled together my "CRAZY" quilt I used a rose colored thread and a maroon thread to create some fun stitches. I started out doing this before adding batting and a backing and realized it would work better if I used the decorative stitches as my quilting. 


The ring tone on my phone is the Waylon Jennings song "I've Always Been Crazy", so whenever my phone rings it blares out my life's theme..."I've always been crazy, but it's kept me from going insane". So I used the letters feature on my machine and attempted to add that to one of the larger sections of fabric. Of course I have never used this feature before and I really didn't know what I was doing, and probably should have practiced first! I tried to fix my lettering with a sharpie, and you can imagine how that worked out on silk fabric. I went too fast when I was stitching the word CRAZY and it looks more like CRABBY, which my husband would tell you fits better anyway! LOL 


I also dug through my mess and found some lace and rick rack to add to the completed top, and then added buttons to hide the corners that didn't quite match up. This would not win a prize for well executed sewing. After I had it quilted, I decided if I was going to create a train wreck I should probably just keep going, I had a scrap of the mint green minky and found a pillow inners and made the finished quilt into a decorative pillow case. 


So that is my finished project for the week, its not the most amazing project I have ever made, or the most beautiful! My phone keeps picking up oranges and browns instead of the rose and grey. But it could be because it is on a brown couch.  The finished pillow is approx. 10 X 15. 

 I hope someday to have "fancy fabric" in rich colors I actually like and brush up on my embroidery skills, and create a real crazy quilt. Someday! 


Thursday, February 18, 2021

More Fun than a Barrel of Monkeys- Project Quilting 12.4

 I know I sound like a broken record, constantly repeating what a weird year 2020 was & how 2021 is turning out to be equally weird. But I think in all honesty everyone feels the same way.

It has just been a weird year. Even the excitement that I normally feel about Project Quilting is somewhat muted & missing something. Everything feels like we are in some sort of Limbo Land. Waiting and anticipating...but exactly what is it we are waiting for?  

While we are all clearly in the same pandemic, each of us has our own waiting and wanting. Which granted that is how life is even when we aren't in a pandemic, but for some reason add the whole insanity of last year & the whole crazy of this year so far, and it just feels extra weird. 

One of my daughters sent this meme to me and told me it was the spitting image of ME over the past year...LOL...she is right! 

So when the challenge for this week came out, I had a difficult time trying to decide if I wanted to be excited about it or not. The challenge was to create something using the quilt block pattern, "Snails Trail" or in some books called the "Monkey Wrench".

Well the monkey wrench pattern I thought of was this one, and I have never liked this quilt block.

So then when I saw the Snail Trail and that is was also called a monkey wrench, I just thought "weird". 

After reading some of the posts from other quilters who had already started the challenge about how challenging the block was, I thought great. I don't like following rules, measuring and cutting. I am a lazy, chop up the fabric and sew, quilter. But I decided maybe this would be good for me to follow a pattern for a change. There are as many ways to make the block as there are variations of quilts using the block. Some very basic and others which are just incredible. 

I think the pattern when done in two colors looks like those funny monkeys in the "Barrel of Monkeys" game. All just stringing along hooked together with their arms and tails.


Somewhere in the back of my mind I was envisioning a barrel of monkeys quilt, in fact I even imagined that somewhere in my stash I had monkey fabric. I did not, but trust me, I will be ordering some.  I decided I was going to make my block into a red monkey swinging through the trees. Just one and keep it simple. 

The block turned out to be easier to make than it looks, and since there are so many different ways to make it, I think I would like to explore some of the methods when I make my monkey quilt in the future. 

I found a pattern that was supposed to be foundation piecing, but decided that was too much work and just cut the triangles and squares and made blocks, without the foundation part of it.  

As you can see, this is not a red monkey, and there are no trees. 

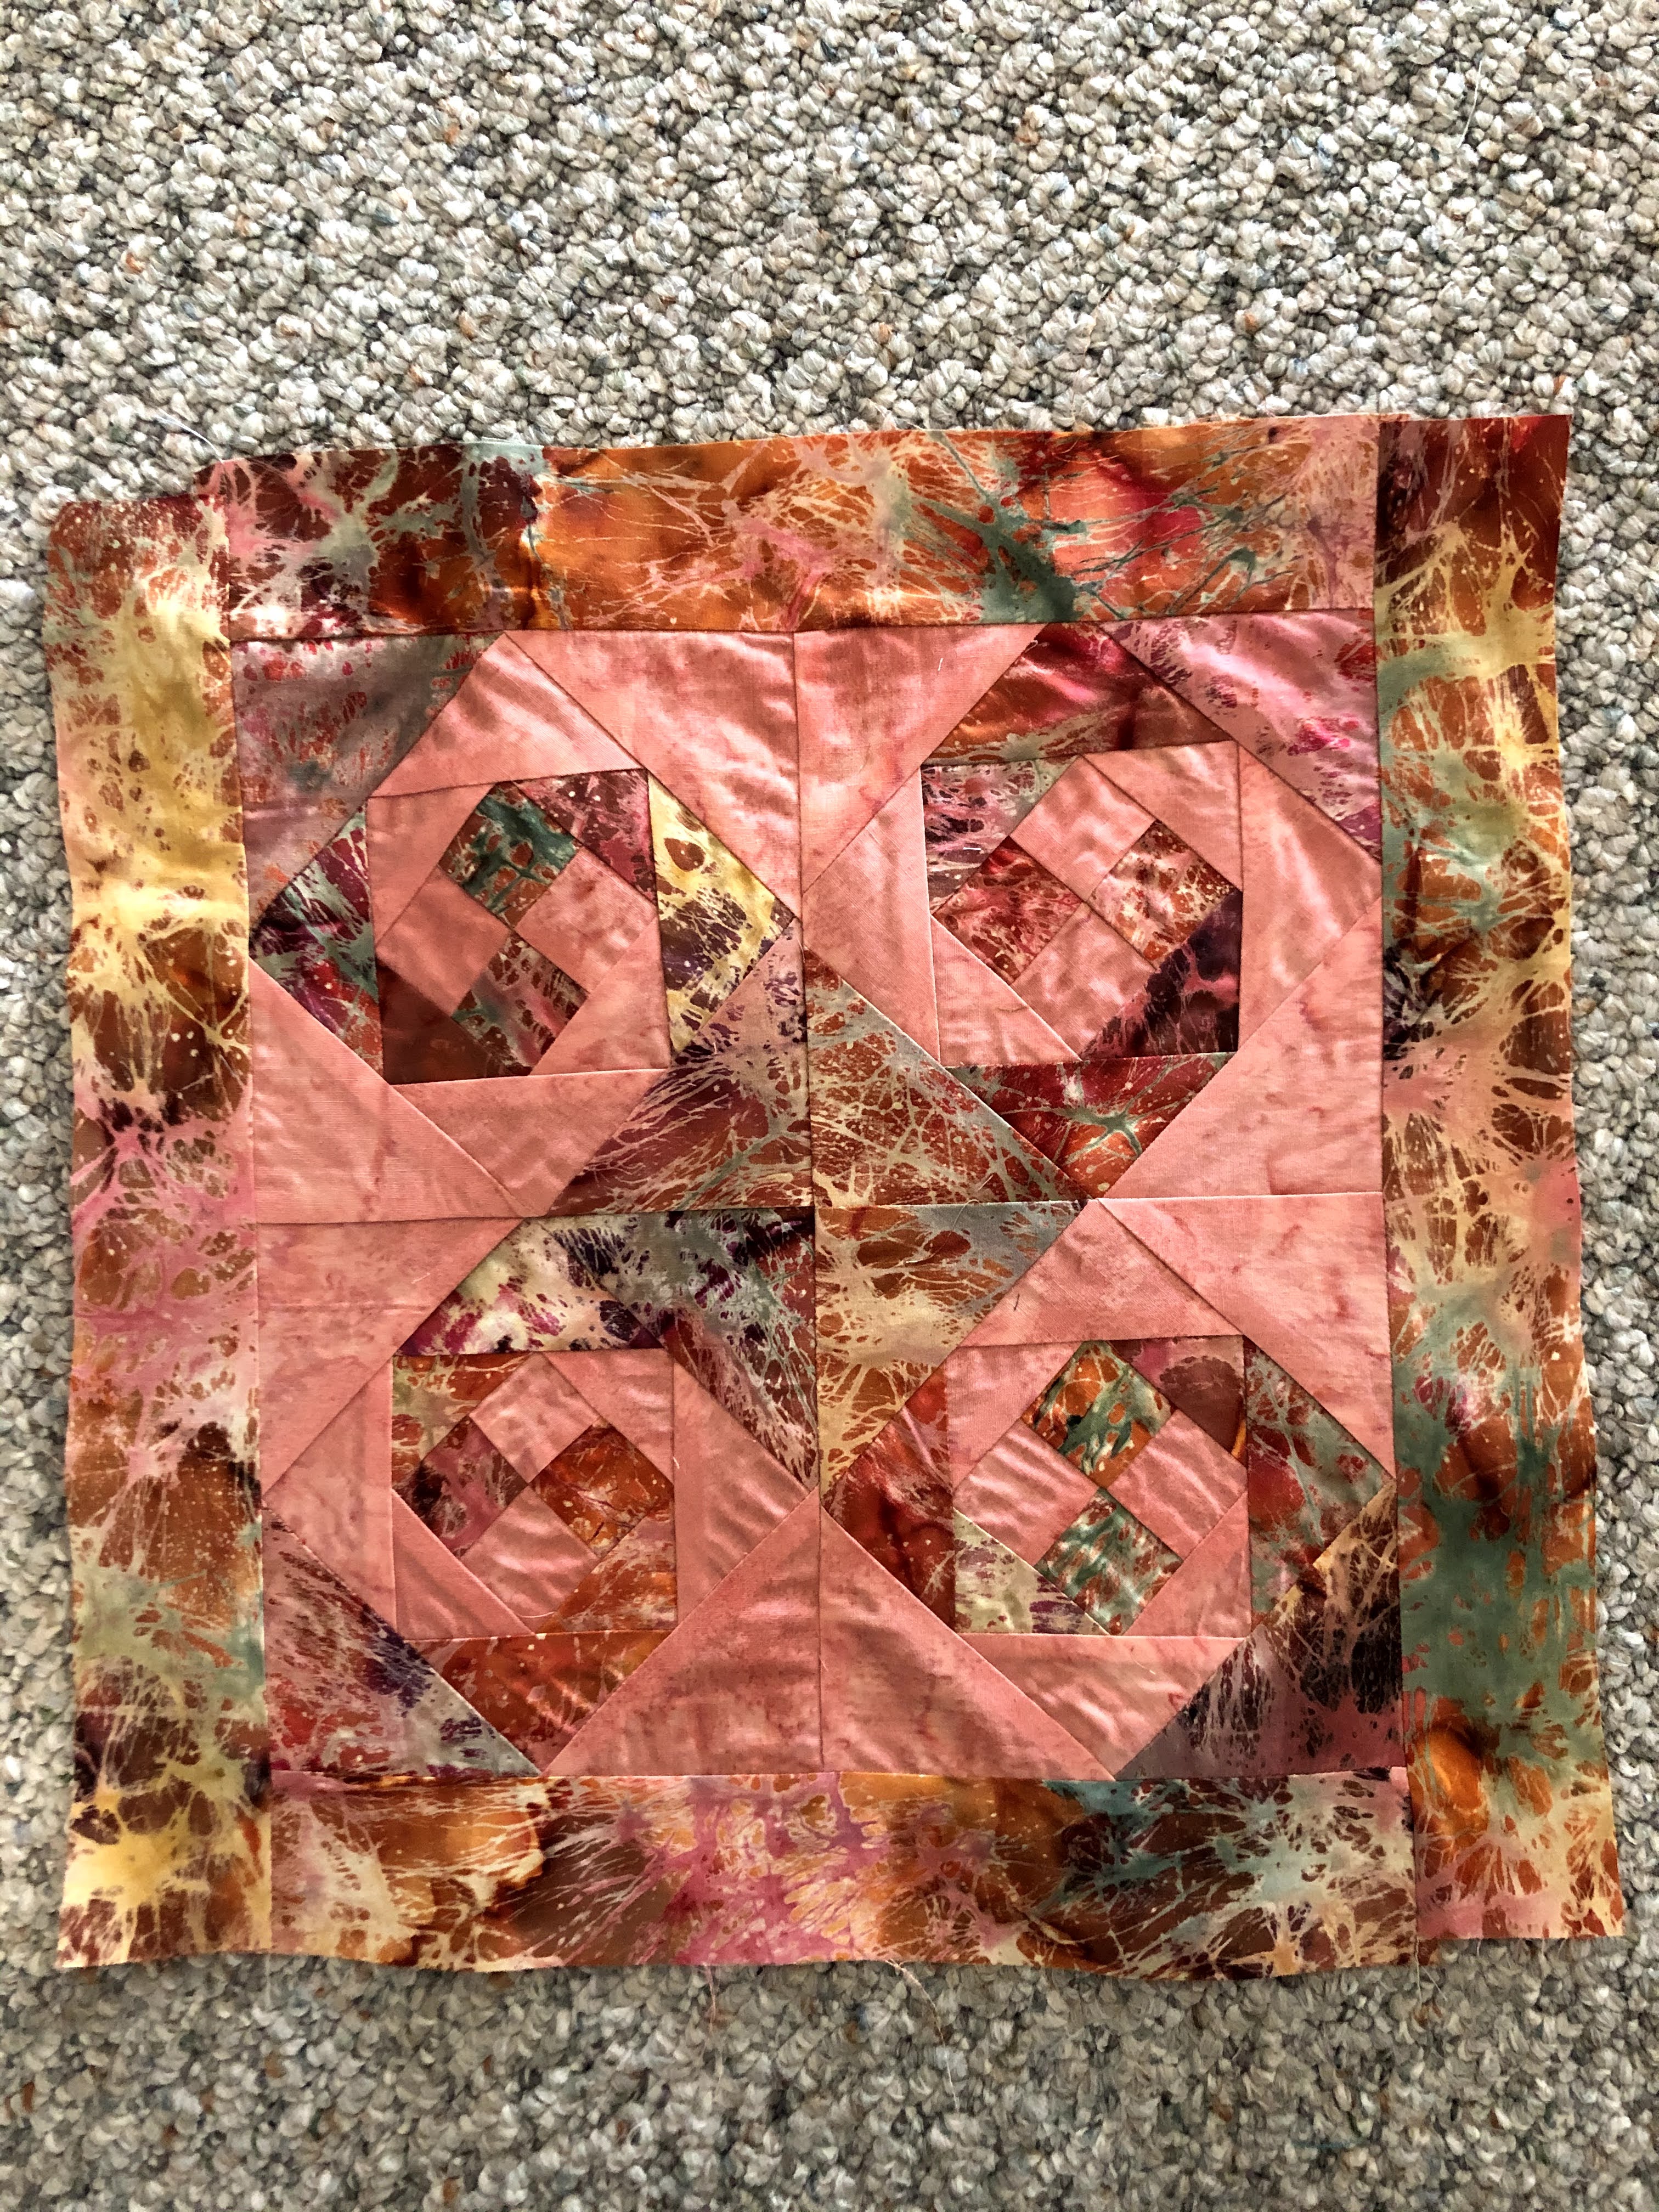
If you have a fabric stash, you know what it's like to dig through all that fabric and get distracted from your original plan. First I found a fun bright colored tropical print that I decided would make really cool snails, so I tossed the monkey out the window and decided to go with a snail instead.

I dug around some more and found a pretty salmon color to use for the back ground, but while digging for that, I came across this amazing piece of hand dyed fabric. I have no idea where it came from, but I wish I had about 10 yards of it instead of the one little fat quarter. It blended so beautifully with the salmon and I knew I had to use it. Of course when sewn together they almost blended too much, and I could no longer see a monkey or a snail. More like an amoeba. 

If I wanted to impress you by pretending to be artsy and know what I was talking about, I would tell you that when I created my challenge piece I was trying to convey the feeling of a cosmic journey, an explosion of swirling star dust, the birth of a cell and the sense that all life is connected though our shared conscience, adding an organic texture to my block using hand dyed fabric and thread painting that tied each piece of the larger block together....  


But truth be told... I picked out two fabrics I really liked, sewed them together, decided they were just weird looking, and found some variegated thread that looked good on the fabric and then quilted them in the hopes that maybe it would look a little less weird and look a little more like "I planned it this way". 

I bound my creation using a piece of brown leafy batik binding that was already cut and in my left over binding pile. My finished piece is 13 x 14. Not quite square...so weird. 


I honestly wasn't sure about this challenge when I started. I was apprehensive about the imagined difficulty in the block itself. But after getting started and figuring out that to get it to sew together correctly I just needed to imagine it as a puzzle piece and follow the pattern layout. The possibilities with the block are endless. 

So in keeping with the weird of the whole past 12 months, instead of a Snail Trail, or a Monkey Wrench, I created a uniquely strange - More Fun than a Barrel of Monkeys Amoeba Quilt. 

Make sure you take a look at the other challenge quilts this week, it is really fun to check out the different ways people have interpreted the block pattern, from snails to witches hats, every idea under the sun! 

They can be found on the Persimon Dreams Blog at kimlapacek.com  under the Project Quilting tab. 


Saturday, February 6, 2021

Project Quilting- 12.3 Virtual Vacation Challenge

After being so lazy in the 12.2 Fussy Cut Challenge I thought I better step up my game this week.

This weeks challenge is "Virtual Vacation" and we were to create a project that symbolized the vacation we aren't on! 

On Sunday when the challenge came out, I thought about a road to somewhere, and I decided I would think about somewhere I wanted to go and then create from there. 

Monday morning I opened my email and the first email that popped up was an ad with an article titled "There Is No Dream Destination", that stuck in my head for the rest of the day, and I kept thinking, well where can I go then? LOL 

It's interesting after almost a year of hanging out at home, for the most part, I realize there is really no place I want to go. There are days when I would like to get in my car and just start driving, no destination, just drive, so I still wanted to do a road theme. But a road to where? 

I had just ordered a stack of fabric from Quilter's Corner in Faulkton, SD and there is a piece from Moda called Cider Golden Delicious Tart. I am in love with this piece of fabric. It has a nostalgic feel of the 70's to it. Remember the record album covers, old rock band posters, the vintage fashion, it's all there in that one piece of fabric.

 So I decided I was going to create something that had the feel of a vintage poster. They say the road to hell is paved with good intentions. I had good intentions to get this project finished early, but the week got away from me, suddenly it was Saturday and I had nothing but a sketched idea on a piece of notebook paper. 


It was cold today, I have customer quilts I need to get done, but I had been up late all week hand binding quilts and I decided I was going to just hang out in my sewing mess and get my challenge quilt done.

Of course I still didn't know where I was going to go on my vacation.  As much fun as we had "Back in the Day",  I really wasn't sure I wanted to travel back to the 70's! 


Thinking about my road in the middle of my design I was reminded of Walt Whitman's poem,

Song of the Open Road, and the line in section 8, 

The efflux of the soul is happiness, 

There have been many days this past year I have felt like happiness was pretty elusive. But this line reminds me that happiness is already inside of me, and I don't need to go looking for it any further than myself. 

So there is where my plan was hatched. A 70's vibe piece of fabric, old rock band posters, happiness, the open road, makes sense doesn't it! LOL 

So I created my little quilt and call it, "My Virtual Vacation on the Road to Happiness". 

I really wanted to find a little mirror to put in the place where my sunbeams are, I wanted the mirror to represent the idea that happiness was inside of us. I couldn't find a round mirror, or a silver button, but I liked the way the  bright shiny gold button looked with my fabric choices. It's all made using fabric scraps, except that one section of good stuff, and I added some road signs with good advice for recharging your Happiness along the way. 

My finished quilt is 8 x 10